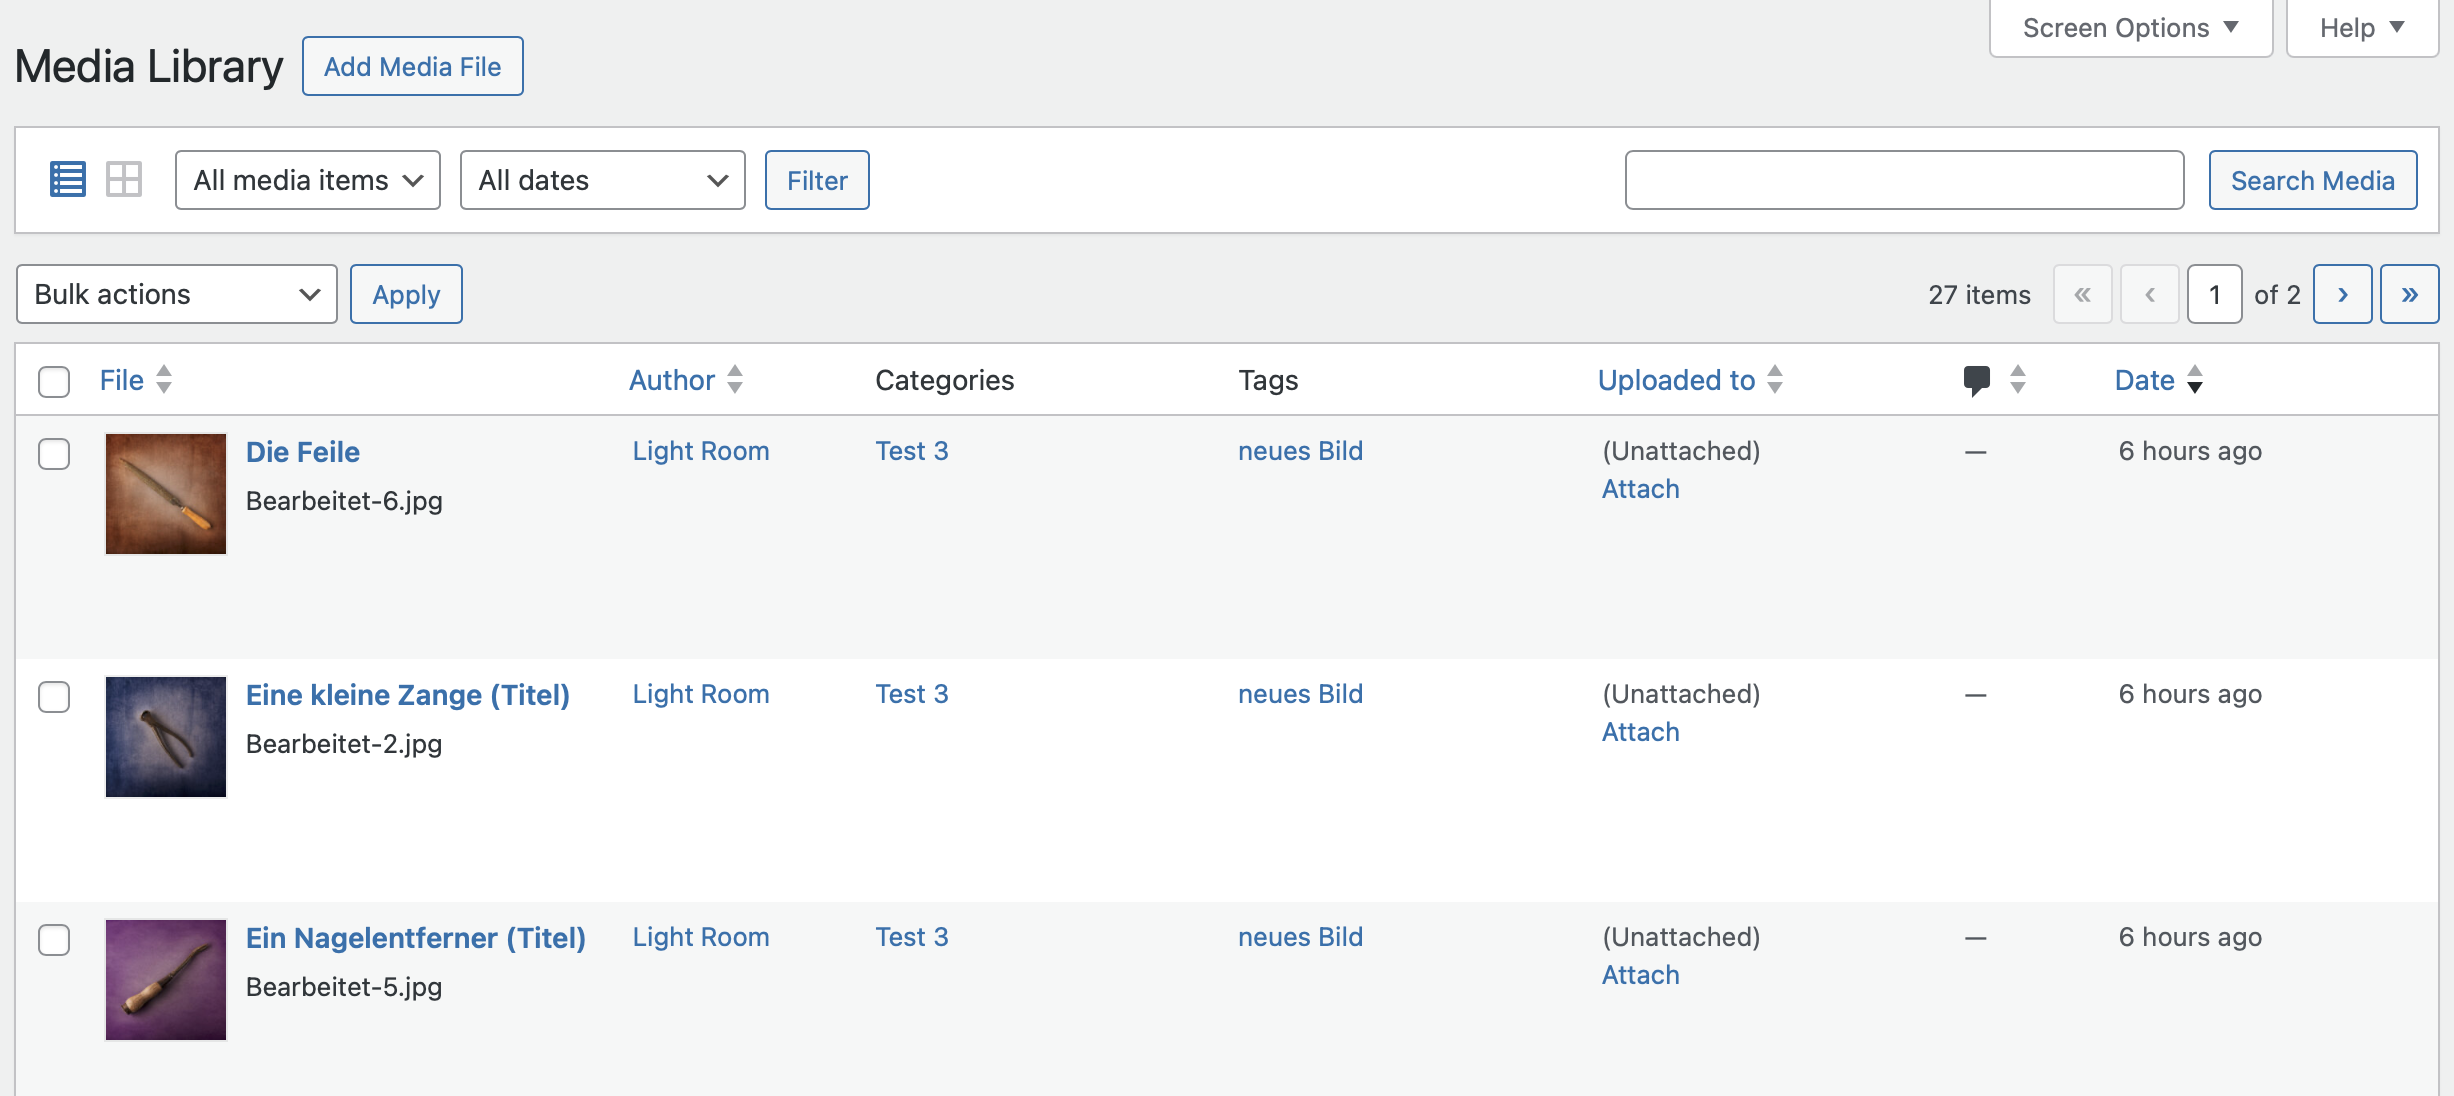
Since version 3.0, Lightroom Classic has allowed you to send photos to a network destination for publishing. The publishing process is similar to the export process, and the Publish Manager dialog box is largely comparable to the Export dialog box. The publishing service stores information about what has been published previously, so you can easily send your new or modified images to the same destination.
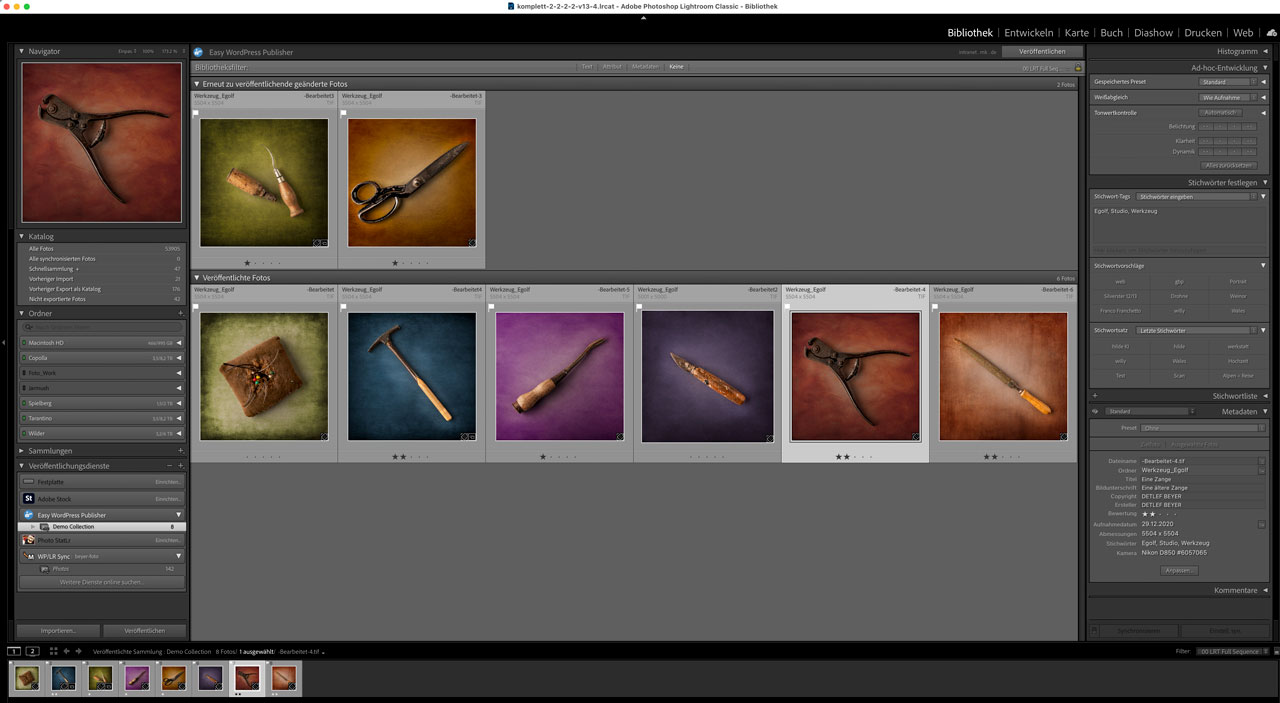
The way Easy WordPress Publisher works is simple: drag a photo into a published collection in Lightroom, and it will be sent to WordPress. From then on, any changes you make to the photo in Lightroom will automatically be updated in the copy on WordPress. If the image is removed from the collection in Lightroom, it is also removed in WordPress. Automatically and easily.
The Easy WordPress Publisher add-on module is a free extension for Adobe Lightroom Classic. Easy WordPress Publisher creates a new publishing service in Lightroom.

Downloads
WordPress
And here you can find the WordPress plug-in
Lightroom Classic
The Lightroom plug-in is available here
The two plug-ins are designed to work together. Only when used together do you get the publishing service with easy synchronization between Lightroom and WordPress.
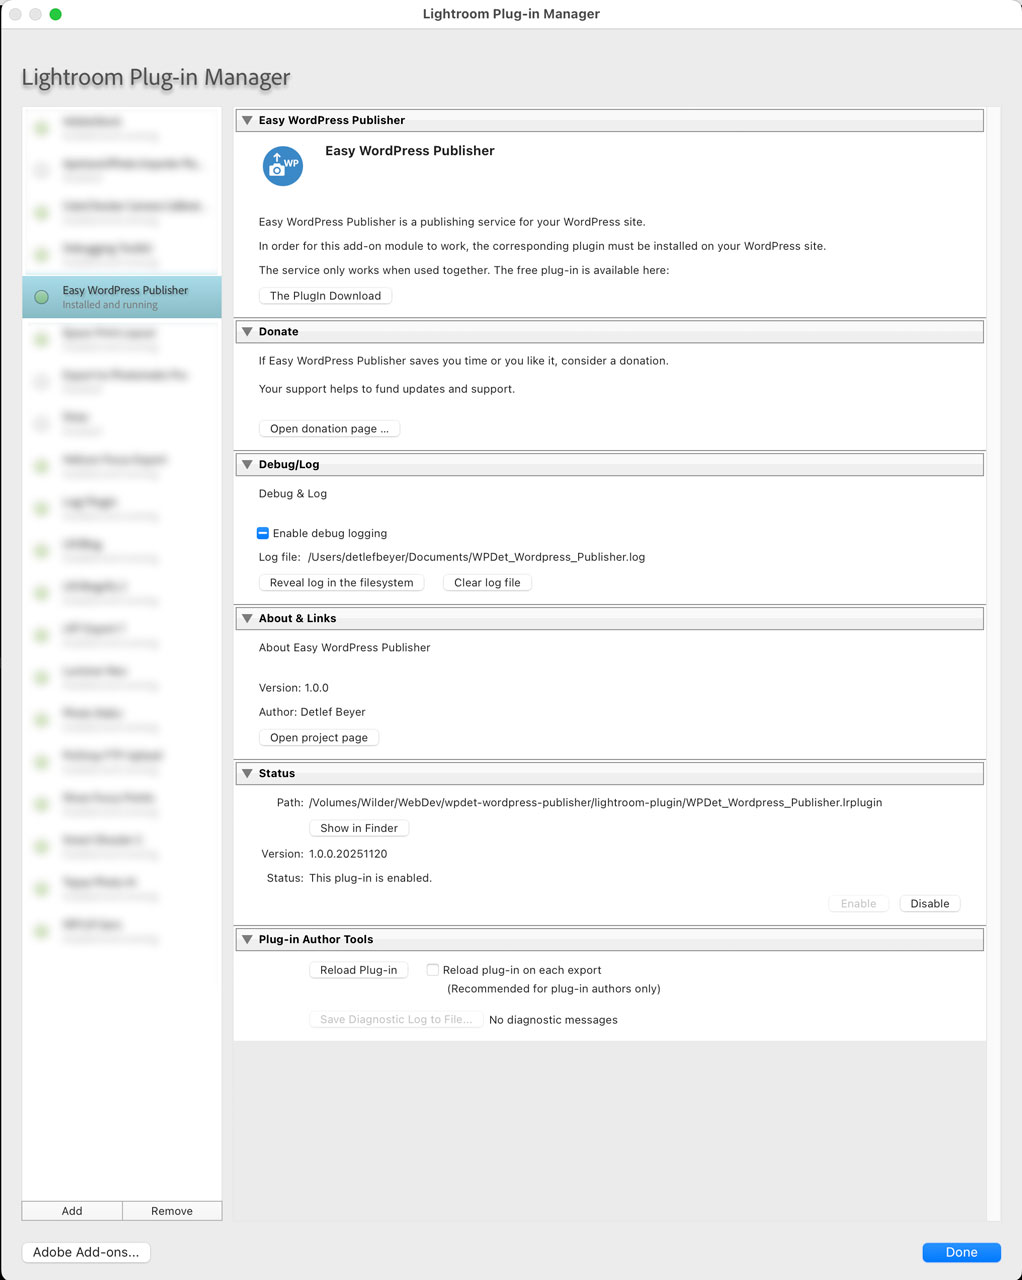
Installation via Adobe Exchange can be challenging. If this is too complicated for you, you can download the LR plug-in right here. Unzip the ZIP file, save the included plug-in for LR to a suitable location on your hard drive, and then add it to LR via the Plug-in Manager.
Two become one
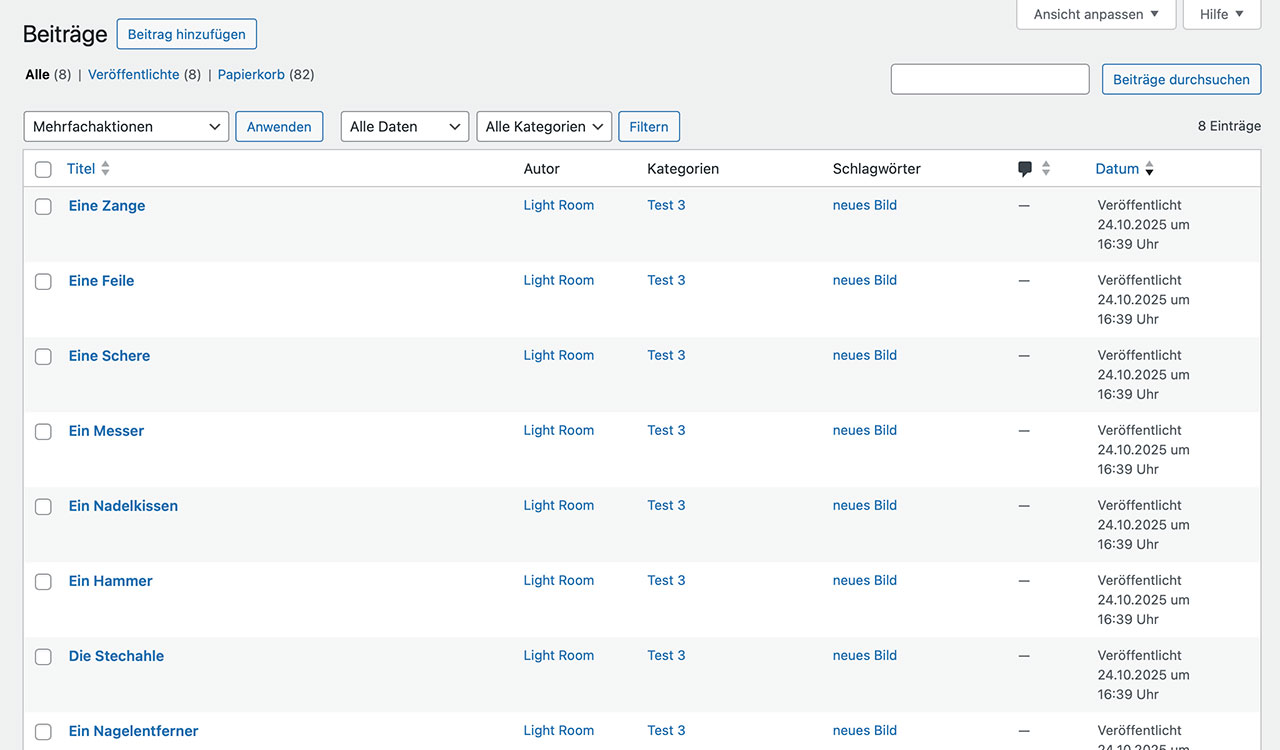
Easy WordPress Publisher is not just an extension for Lightroom. It also includes a matching plugin for WordPress, which is also free of charge. Only when used together do they form a functioning solution. The WordPress plugin provides a secure and stable interface for the Lightroom extension. It also expands the media library in WordPress with taxonomies, a category, and keywords for the images. The values for this taxonomy are synchronized between Lightroom and WordPress. This makes it easy to select images for a gallery. The appropriate shortcode for displaying the images is also provided. If desired, the WordPress plugin can also create a post for each image with the linked image.

Installation – part 1 – Lightroom
You can get the Plug-in for Lightroom directly from Adobe Exchange. The new publishing service is installed via the Plug-in Manager. You can find it in the “File” menu, for example. Save the Easy WordPress Publisher file to a suitable location on your PC or Mac. Then open the Plug-in Manager and click on “Add” in the lower left corner. In the following dialog, select the Easy WordPress Publisher Plug-in on your workstation and you’re almost done. A new publishing service is now available to you. However, we still need to configure a few settings.

Installation – part 2 – configure the Plug-in
Once you have installed the Easy WordPress Publisher Plug-in and activated it, you can use it to create as many publishing services of this type as you like. This means you can synchronize not just one WordPress site, but as many as you want. What’s more, you can store different settings for each publishing service. This allows you to assign images to different areas in WordPress. Within a publishing service, you can create collections to bring even more structure to your files.
Basically, there should always be a 1:1 relationship between the image in Lightroom and the image in WordPress. If you create multiple publishing services, they should contain different images. It is not a good idea to use one publishing service in different Lightroom catalogs with the same WordPress site. This quickly leads to chaos, as the references get mixed up.
And yes – great idea – if you like, you can send a donation.
A new publishing service
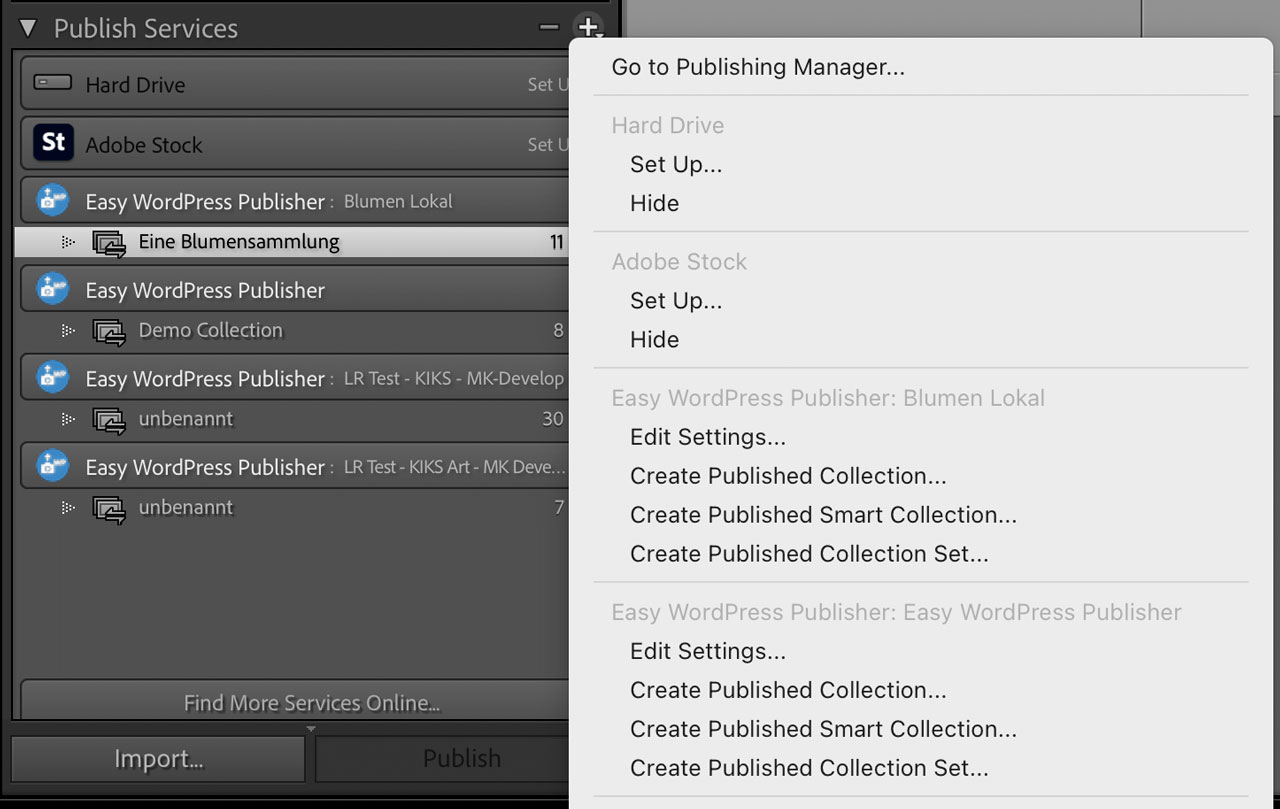

You have now activated this new type of publishing service in Lightroom. You can now create as many instances of this type as you like. For example, if you manage two WordPress sites, you can create two publishing services of the Easy WordPress Publisher type. The appropriate settings for each WordPress site are stored for each publishing service.
Simply open the publishing manager under “Publishing Services.” There you can now create a new publishing connection (I really can’t do anything about the names of the functions in Lightroom). Just click on “Add” on the left and select Easy WordPress Publisher as the service. Give your publishing service a meaningful name and then proceed to the settings for this specific service.
Configure your publisher

As mentioned, you must create a separate publishing service for each website.
Enter the URL of the website. Please include https:// or http://. Do not add any paths such as /wp-content/. Just the base URL of the website. Then you need to enter a user from WordPress with their login name. I recommend creating a separate user in WordPress just for this task. This will make many things easier later on. The role must be set to at least Author, otherwise the necessary rights to manage images on behalf of the user will be missing. We also need an application password from this user. I will explain how to obtain this password in the WordPress section of the service. Simply copy it and paste it here.
If the post type is set to “Media,” only new images will be created in the media library. If it is set to “Post,” a post will also be created in addition to the image. Optionally, the image can be set as the featured image right away. Then the image and post are directly linked. The visibility “Published” or “Draft” refers to the post. You can also change this later and republish the images – WordPress will then reflect the current settings from Lightroom.
In WordPress, my plugin adds a taxonomy to the media library. This includes categories and tags, just like with posts. This is helpful when selecting images for a gallery later on.
The category you select here in the publishing service applies to all images that are synchronized via this publishing service. Available categories can be loaded via “Update Taxonomies” in WordPress. You can simply enter keywords here.
The keywords from Lightroom are also sent to WordPress—but they are copied into the image’s “Description” field and not used as tags. I didn’t find this very useful.
Last but not least, you can set a waiting time between the transfer of two images. Some servers prefer a slower transfer. Everything else works the same as with any other publishing service in Lightroom. So let’s take a look at WordPress now.
Installation – part 3 – WordPress

The publishing service for Lightroom Classic consists of two parts. The WordPress plugin Easy Photo Publisher complements my Adobe Lightroom Classic Easy WordPress Publisher add-on module. Only when used together do they enable you to synchronize images from Lightroom with your WordPress site.
The next step is to install the plugin. Go to the admin area of your website and select the menu item “Add Plugin” under “Plugins” (you must have the rights to install a new plugin, of course). Search for the plugin called “Easy Photo Publisher” by Detlef Beyer and then select “Install Now.” Once this has been done, you will see the new plugin under “Installed Plugins.” Now you need to activate the plugin and you’re done with the installation.
The plugin now provides three things in your WordPress installation:
- an interface (REST) for the Lightroom extension Easy WordPress Publisher
- taxonomies for images (categories and tags)
- a simple shortcode to display the images in a gallery
WordPress Application Password

The next step is to create an application password in WordPress for connecting to the Easy WordPress Publisher Lightroom extension. This secures access to WordPress. Without the password, there is no access to the plug-in.
In WordPress, the application password is always assigned to a user. I recommend creating a separate user just for communicating with Lightroom. This user must have at least the rights of the “Author” role. Simply create a new user, select “Author” as the role, and give the user a descriptive name.
Open the user’s profile page. Then you can create a new application password at the bottom of the user’s settings page. Give the password a name and create it by clicking “Add application password.” You will now see the new application password. Important: copy and remember the application password now. This will not be possible later! If you forget the application password, you will simply have to create a new one. Save the changes for the user and this part is also complete.
You must enter your user’s username and application password in the Easy WordPress Publisher Lightroom extension! This will establish the connection between WordPress and Lightroom.
WordPress PlugIn Settings


Select Easy Photo Publisher from the “Settings” menu. The settings page for the plugin should now appear.
There is only one option in the settings for the Easy Photo Publisher plugin. The taxonomies (categories and tags) for the images can be enabled or disabled. You are already familiar with categories and tags from posts. If they are activated with the plugin, categories and tags will appear with the images—just as they did previously with posts. Categories and tags can be very useful if the images are to be selected automatically for display later on.
In Lightroom, you can easily retrieve the categories available in WordPress and then link them to a publishing service. Subsequently, all images are automatically assigned to the corresponding category when synchronized with WordPress.
Don’t forget: after changing the settings, you must save them.
WordPress Shortcode to build a Gallery
You can use the synchronized images like any other image in WordPress. To make the display at least a little easier, the Easy Photo Publisher plugin provides a shortcode. The shortcode uses the categories and keywords to select the images. The corresponding option should therefore be enabled in the Easy Photo Publisher plugin.
The shortcode looks like this:
[wpdet_gallery category="Portugal" limit="12" order="DESC" min_width="240px" gap="1.5rem" size="large" class="" showcaption="false" lightbox="true"]
There are several options available. You can use them, but none of them are mandatory. [wpdet_gallery] would simply display the first images in your media library. The use of the “category” attribute is particularly interesting. This allows you to limit the selection to images in the media library that have been assigned to this category. You could assign the category “Portugal” to all images in the publishing service in Lightroom and then use [wpdet_gallery category=“Portugal“] to display exactly these images. If you add new images in Lightroom, they will automatically appear in your gallery. Cool, right?
The possible options for the shortcode are (always enter in quotation marks):
- category -> limits the selection to images assigned to this category. The spelling must be correct.
- tags -> limits the selection to images containing this keyword. The spelling must be correct.
- limit -> limits the number of images displayed. If set to -1, all images are shown.
- order -> ASC for ascending order and DESC for descending order
- min_width -> how wide the images should be displayed in the gallery
- gap -> how much space should be left between the images (the gallery is responsive)
- size -> ‘thumbnail’, ‘medium’, ‘large’ or ‘full’
- class -> if you want to link your own CSS class to the shortcode
- showcaption -> true or false. If the value is “true”, the caption, if available, will be displayed below the image
- lightbox -> true or false. If the value is “true”, a lightbox functionality will be added to the images.
Create WordPress Posts
The Easy WordPress Publisher Lightroom extension offers the option to create a new post directly with an image. Another optional feature is the ability to assign the image as the first featured image for this new post. Depending on how you use WordPress, this can be quite useful. Unlike images, posts are not synchronized with Lightroom. Once created, posts must be managed in WordPress.
Use your own templates for the shortcode
You can completely replace the HTML used for the gallery with your own templates. To do this, copy your templates into your theme – preferably into your child theme:
child-theme/
└── wpdet/
  └── templates/
     ├── wrapper.php (uses tokens: wpdet_items}, wpdet_min_width}, wpdet_gap}, wpdet_extra_class})
     └── gallery.php (uses tokens: wpdet_link_open}, wpdet_img}, wpdet_link_close}, wpdet_caption})
wpdet_items}, wpdet_min_width}, wpdet_gap}, wpdet_extra_class})
└── gallery.php (uses tokens: wpdet_link_open}, wpdet_img}, wpdet_link_close}, wpdet_caption})
The tokens shown can be used in your own template to dynamically display the image data.
You can also override the gallery’s CSS at:
child-theme/wpdet/css/wpdet-gallery.css
If the templates are available in a child theme, this version will be used, followed by the parent theme and finally the plugin’s fallback.
Adobe and Adobe Lightroom Classic are either registered trademarks or trademarks of Adobe in the United States and/or other countries.